Showing posts with label dessert. Show all posts

Tuesday, September 13, 2011

Delicious Seed Cake

I've used this recipe of Delia Smith's as a basis for some experimentation.


As is the recipe makes a brilliant old fashioned seed cake.

110 grams Butter
110 grams Sugar
Two eggs
150 grams wheat
25 ground almonds
1 teaspoon baking powder
1/2 teaspoon salt
2-3 tablespoons milk
2 tablespoons caraway seeds
Some demerara sugar
Some flaked almonds

Basic batter making: Beat butter and sugar together and add the eggs. After that the wheat, baking powder and salt follows. Lastly gently add the caraway seeds and almonds into the mix. Add some milk to give the batter the right consistency (use own judgement) and drop into tin. Sprinkle demerara sugar and flaked almonds over the cake. Bake for 50-60 mins at 180°C or 350°F or until the cake is golden and the sides have started shrinking from the sides of the tin.

You can also skip the caraway seeds and add two tablespoons fresh, shredded ginger and the zest from one lime to make a very nice ginger and lime cake. In that case I recommend skipping the almond flakes on top and replace them with some lime zest.


Saturday, July 30, 2011

Blueberry Pie (Cook's Illustrated)


Published July 1, 2008. From Cook's Illustrated.

WHY THIS RECIPE WORKS:

When perfecting our blueberry pie recipe, we found that adding a peeled, grated Granny Smith apple, rich in pectin, helped thicken the berries and enhance their flavor.

MAKES ONE 9-INCH PIE

This recipe was developed using fresh blueberries, but unthawed frozen blueberries (our favorite brands are Wyman’s and Cascadian Farm) will work as well. In step 4, cook half the frozen berries over medium-high heat, without mashing, until reduced to 1 1/4 cups, 12 to 15 minutes. Grind the tapioca to a powder in a spice grinder or mini food processor. If using pearl tapioca, reduce the amount to 5 teaspoons. Vodka is essential to the texture of the crust and imparts no flavor; do not substitute.

INGREDIENTS

  • Foolproof Pie Dough
  • 2 1/2cups unbleached all-purpose flour (12 1/2 ounces), plus more for work surface
  • 1teaspoon table salt
  • 2tablespoons sugar
  • 12tablespoons cold unsalted butter (1 1/2 sticks), cut into 1/4-inch slices
  • 1/2cup vegetable shortening , cold, cut into 4 pieces
  • 1/4cup vodka , cold (see note)
  • 1/4cup cold water
  • Blueberry Filling
  • 6cups fresh blueberries (about 30 ounces) (see note)
  • 1Granny Smith apple , peeled and grated on large holes of box grater
  • 2teaspoons grated zest and 2 teaspoons juice from 1 lemon
  • 3/4cup sugar (5 1/4 ounces)
  • 2tablespoons quick-cooking tapioca , ground (see note)
  • pinch table salt
  • 2tablespoons unsalted butter , cut into 1/4-inch pieces
  • 1large egg , lightly beaten with 1 teaspoon water

INSTRUCTIONS

  1. 1. For The Pie Dough: Process 1 1/2 cups flour, salt, and sugar in food processor until combined, about two 1-second pulses. Add butter and shortening and process until homogenous dough just starts to collect in uneven clumps, about 15 seconds; dough will resemble cottage cheese curds and there should be no uncoated flour. Scrape bowl with rubber spatula and redistribute dough evenly around processor blade. Add remaining cup flour and pulse until mixture is evenly distributed around bowl and mass of dough has been broken up, 4 to 6 quick pulses. Empty mixture into medium bowl.

  2. 2. Sprinkle vodka and water over mixture. With rubber spatula, use folding motion to mix, pressing down on dough until dough is slightly tacky and sticks together. Divide dough into 2 even balls and flatten each into 4-inch disk. Wrap each in plastic wrap and refrigerate at least 45 minutes or up to 2 days.

  3. 3. Remove 1 disk of dough from refrigerator and roll out on generously floured (up to 1/4 cup) work surface to 12-inch circle, about 1/8 inch thick. Roll dough loosely around rolling pin and unroll into pie plate, leaving at least 1-inch overhang on each side. Working around circumference, ease dough into plate by gently lifting edge of dough with one hand while pressing into plate bottom with other hand. Leave dough that overhangs plate in place; refrigerate while preparing filling until dough is firm, about 30 minutes.

  4. 4. For The Filling: Adjust oven rack to lowest position, place rimmed baking sheet on oven rack, and heat oven to 400 degrees. Place 3 cups berries in medium saucepan and set over medium heat. Using potato masher, mash berries several times to release juices. Continue to cook, stirring frequently and mashing occasionally, until about half of berries have broken down and mixture is thickened and reduced to 1 1/2 cups, about 8 minutes. Let cool slightly.

  5. 5. Place grated apple in clean kitchen towel and wring dry. Transfer apple to large bowl. Add cooked berries, remaining 3 cups uncooked berries, lemon zest, juice, sugar, tapioca, and salt; toss to combine. Transfer mixture to dough-lined pie plate and scatter butter pieces over filling.

  6. 6. Roll out second disk of dough on generously floured (up to 1/4 cup) work surface to 11-inch circle, about 1/8 inch thick. Using 1 1/4-inch round biscuit cutter, cut round from center of dough. Cut another 6 rounds from dough, 1 1/2 inches from edge of center hole and equally spaced around center hole. Roll dough loosely around rolling pin and unroll over pie, leaving at least 1/2-inch overhang on each side.

  7. 7. Using kitchen shears, trim bottom layer of overhanging dough, leaving 1/2-inch overhang. Fold dough under itself so that edge of fold is flush with outer rim of pie plate. Flute edges using thumb and forefinger or press with tines of fork to seal. Brush top and edges of pie with egg mixture. If dough is very soft, chill in freezer for 10 minutes.

  8. 8. Place pie on heated baking sheet and bake 30 minutes. Reduce oven temperature to 350 degrees and continue to bake until juices bubble and crust is deep golden brown, 30 to 40 minutes longer. Transfer pie to wire rack; cool to room temperature, at least 4 hours. Cut into wedges and serve.

RECIPE TESTING

LOOKS CAN BE DECEIVING

  • Pretty But Pasty

    Too much tapioca (or the wrong thickener, such as flour or cornstarch) results in a filling that holds its shape but tastes gluey and dull.

  • Fresh But Soupy

    With no thickener at all, there is plenty of fresh berry flavor, but the filling is loose and runny.

TECHNIQUE

NO-FUSS TOP CRUST

  • We used a 1 1/4-inch biscuit cutter to cut holes in the dough, but a spice-jar lid will also do the trick.

THE APPLE OF MY PIE

When making our blueberry pie filling, we found that if we used more than 2 tablespoons of tapioca, the texture of the filling took on a gummy consistency we didn’t like. But 2 tablespoons or less resulted in a filling that was too loose. Could we solve this problem with pectin, a gentle thickener that occurs naturally in fruit?

EXPERIMENT

As a control, we thickened one pie with 2 tablespoons tapioca. We then compared it with a second pie thickened with 2 tablespoons tapioca and a grated apple, which is high in pectin and has a mild flavor. (We hoped that grating the apple would make it less noticeable in the baked pie.)

RESULTS

As expected, the pie thickened with tapioca alone was loose and soupy. But the pie thickened with tapioca plus an apple had a naturally gelled texture that was just right. The apple bits seemed to melt into the berry filling during baking, boosting fruity flavor but leaving no textural sign of their presence.

EXPLANATION

Pectin is a natural substance, found in fruits and vegetables, that creates structure in a plant by helping to bind its cell walls together. This same substance is used to thicken jams and jellies into a set, but soft, mass. Pectin content varies from fruit to fruit and also within a plant (more pectin is found in the skin of a fruit than in its flesh, for example). Apples are a great source of pectin because they contain high levels of high-methoxy pectin, the best natural pectin for making gels. By mashing some of the blueberries and grating the apple, we helped to release the pectin from the fruits’ cell walls so that it could thicken the pie filling.

  • ON THE LOOSE
    Pie filling thickened without enough tapioca won't firm up. But too much tapioca leads to gumminess.

  • ALL FIRMED UP
    A little tapioca plus a grated apple created a juicy but sliceable filling.

Wednesday, July 27, 2011

Garbanzo Bean Chocolate Cake


Ingredients

  • 1 1/2 cups semisweet chocolate chips
  • 1 (19 ounce) can garbanzo beans, rinsed and drained
  • 4 eggs
  • 3/4 cup white sugar
  • 1/2 teaspoon baking powder
  • 1 tablespoon confectioners' sugar for dusting

Directions

  1. Preheat the oven to 350 degrees F (175 degrees C). Grease and flour a 9 inch round cake pan.
  2. Place the chocolate chips into a microwave-safe bowl. Cook in the microwave for about 2 minutes, stirring every 20 seconds after the first minute, until chocolate is melted and smooth. If you have a powerful microwave, reduce the power to 50 percent.
  3. Combine the beans and eggs in the bowl of a food processor. Process until smooth. Add the sugar and the baking powder, and pulse to blend. Pour in the melted chocolate and blend until smooth, scraping down the corners to make sure chocolate is completely mixed. Transfer the batter to the prepared cake pan.
  4. Bake for 40 minutes in the preheated oven, or until a knife inserted into the center of the cake comes out clean. Cool in the pan on a wire rack for 10 to 15 minutes before inverting onto a serving plate. Dust with confectioners' sugar just before serving.

Saturday, March 5, 2011

Maple pecan pie by Williams-Sonoma

Found here.


Pure maple syrup, made from the boiled sap of the sugar maple tree, comes in three grades. Grade A Light or Fancy syrup, sometimes called Grade AA, is clear gold and has a wonderfully subtle flavor, but its delicate character does not hold up in cooking. Grade B syrup is produced only in Vermont and has more maple flavor than Grade A. Sometimes called "baking" or "cooking" maple syrup, it is ideal for use in this recipe. Grade C has a robust, molasses-like flavor and is used primarily in making commercial table syrups.

Ingredients:

  • 1 rolled-out round of basic pie dough (see
     related recipe at left)
  • 2 cups pure maple syrup
  • 2 eggs, lightly beaten
  • 1/4 cup firmly packed light or dark brown sugar
  • 1/8 tsp. salt
  • 2 Tbs. unsalted butter, melted
  • 1 tsp. vanilla extract
  • 1 1/2 cups pecans, coarsely chopped

Directions:

Fold the dough round in half and carefully transfer to a 9-inch pie pan or dish. Unfold and ease the round into the pan, without stretching it, and pat it into the bottom and firmly up the sides of the pan. Using kitchen scissors, trim the edge of the dough, leaving 3/4 inch of overhang. Fold the overhang under itself and pinch it together to create a high edge on the pans rim. Flute the edge decoratively.

Refrigerate or freeze the pie shell until firm, about 30 minutes. Meanwhile, position a rack in the lower third of an oven and preheat to 375°F.

Line the pastry shell with aluminum foil or parchment paper and fill with pie weights or raw short-grain rice. Bake for 20 minutes, then lift an edge of the foil. If the dough looks wet, continue to bake, checking every 5 minutes, until the dough is pale gold, for a total baking time of 25 to 30 minutes. Transfer to a wire rack. Reduce the oven temperature to 350°F.

In a saucepan over medium-high heat, bring the maple syrup to a boil and boil for 8 to 10 minutes to reduce. Remove from the heat and pour into a heatproof measuring pitcher. The syrup should be reduced to 1 1/2 cups. If necessary, return the syrup to the saucepan and continue to boil until sufficiently reduced. Let cool to room temperature before proceeding.

In a bowl, stir together the eggs, brown sugar, reduced maple syrup, salt, melted butter and vanilla until well mixed. Add the pecans and stir well. Pour into the partially baked pie shell, making sure the pecans are evenly distributed.

Bake the pie until the center is slightly puffed and firm to the touch, 30 to 35 minutes. Transfer to a wire rack and let cool until just slightly warm, about 45 minutes, before serving. Makes one 9-inch pie; serves 8.

Serving Tip: Serve with sweetened whipped cream flavored with 1 Tbs. bourbon, if desired.
Adapted from Williams-Sonoma Collection Series, Pie & Tart, by Carolyn Beth Weil (Simon & Schuster, 2003).

Sunday, February 6, 2011

Creme Brulee (Crème Brûlée) by Michael Chu

This is one "fancy" dessert that you can make ahead of time with a minimum of effort and still have all your guests excited about your culinary skills.

Creme brulee should start with a custard base that is richer, creamier, and silkier than other cremes (creme anglaise, creme caramel, flan, etc.).

On top of that custard should be a layer of caramelized sugar. This sugar can be thick or thin. Thin layers (some as thin as paper) are produced by directly heating a sugar layer using a broiler or torch. I make my creme brulee with a torch and turbinado sugar (muscovado sugar).
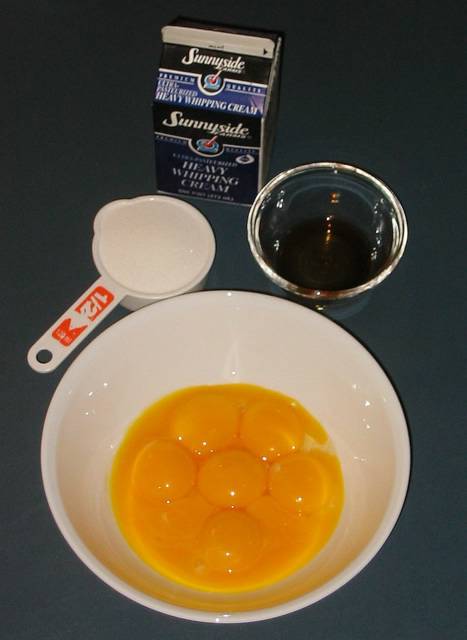

Ingredients

2 cups heavy cream

1/2 teaspoon vanilla extract

8 large egg yolks

1/2 cup sugar.


Prosidure:

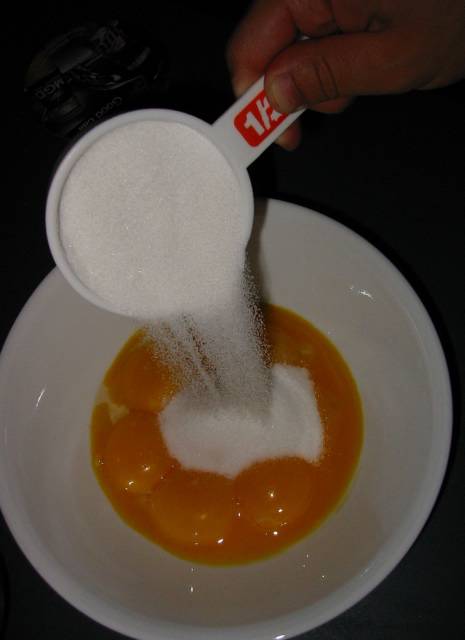
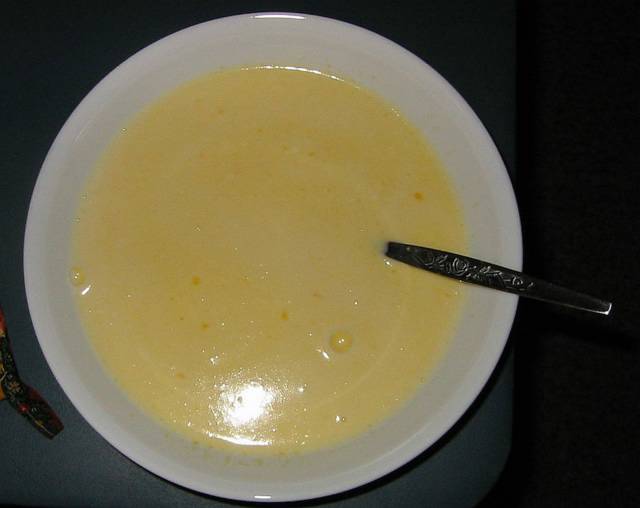
First pour the sugar into the egg yolks.


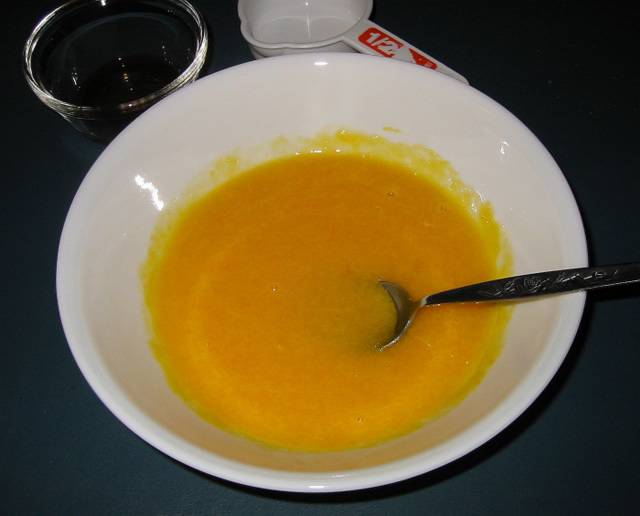
Beat the yolks until smooth.


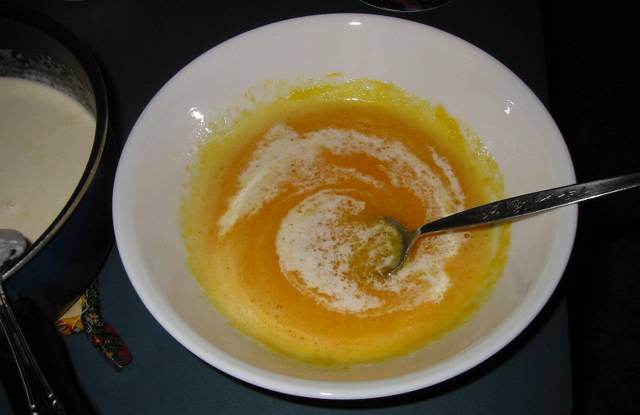
Heat the heavy cream until almost simmering (you can bring to a simmer and let it cool a minute). Add heavy cream to the egg yolks one tablespoon at a time while stirring vigorously. This will temper the eggs so as to not curdle them (or make scrambled eggs) when exposed to the heat of the heavy cream.


When about 1/4 cup of heavy cream has been integrated into the yolks, pour the yolks into the heavy cream and mix until smooth.


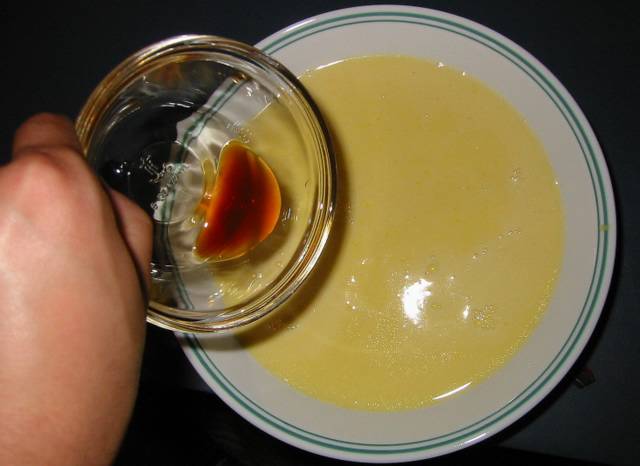
Now, using a fine mesh sieve, strain the custard mixture to remove any small clumps that may remain in the mixture. This step will help ensure a silky texture to the custard. Blend in the vanilla extract after the mixture has been strained.


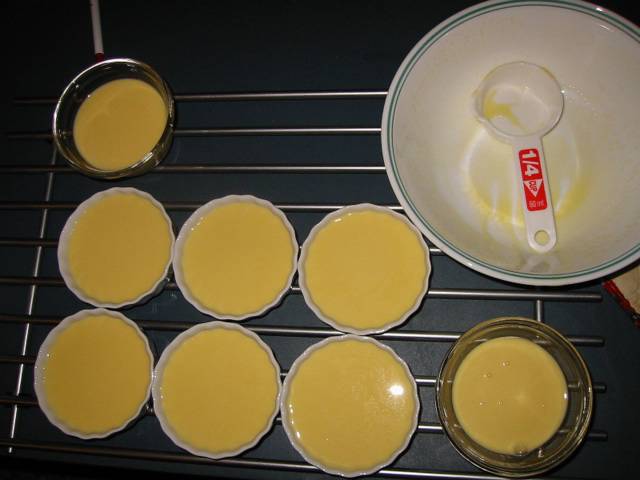
Pour the mixture into six to eight ramekins depending on size. (Makes a little more than eight four-ounce creme brulees.) In the picture below, I filled six four-ounce ramekins and two six ounce ramekins (the six-ouncers were not full).


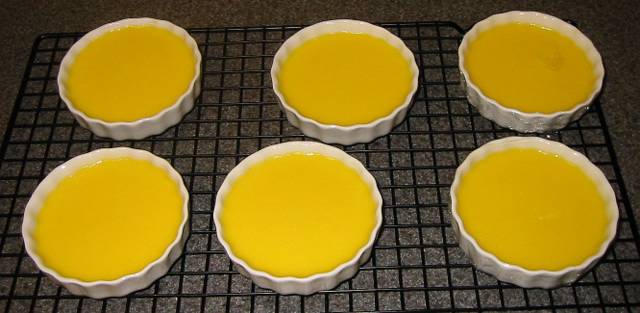
Place the ramekins in a baking pan. Pour boiling water into the pan (be careful not to get water into the ramekins), so that the water level is halfway up the sides of the ramekins. Cooking the custards in a water bath will provide a low even temperature for the custards to cook evenly and set properly. Place in an oven preheated to 250°F for about one hour.


After an hour, check to see if the custards are done. We want them to be set on the outside edge, but jiggly (like jello) at the center. The easiest way to do this is to take a pair of tongs with food grade rubber bands wrapped around the ends to help grip the ramekins. Pick up a ramekin and shake to see if the centers jiggle. If only the center jiggles a little, it's done. If the whole thing is set, remove immediately - it'll be a little over done, but still delicious. If it's not done, just put it back in the water bath and check again in ten minutes. Once the custards are done, let them cool on a cooling rack to room temperature. This will let the custards finish cooking the centers on their own.


Wrap the custards in their ramekins in plastic wrap and refrigerate for at least eight hours before serving.

About an hour before serving, remove the plastic wrap from each ramekin and use a paper towel to gently soak up any moisture that may have extruded from the custard tops.

Pour about a teaspoon of turbinado ("sugar in the raw") sugar in the middle of each custard.

Tilt the ramekin and gently shake to let gravity move the sugar around until the top surface of the custard is covered evenly with turbinado sugar.

Using a kitchen butane torch, propane blow torch, or welding torch (whatever strong open flame you've got lying around), heat the sugar until it bubbles and changes color.

With a small butane torch, I take my time and don't move from one side of the creme brulee to the other until the spot I've been working on has achieved the brown color that I want. This takes a little over a minute for each creme brulee. (The process is faster with a larger torch.)

Don't worry about heating up the custard underneath, we'll refrigerate the creme brulee for a bit before serving. Do worry about lighting your kitchen counter on fire. I usually place the ramekin on a piece of aluminum foil placed over a cooling rack.

Once you're done scorching your cream, place the ramekins back in the refrigerator for about 45 minutes. The caramel will still be hard, but if you wait too much longer, the sugar will start to soften and dissolve into the custard.


Créme brûlée for 8 people

Preheat the oven to 250°F or 120°C

Mix 8 large (135 gr) egg yolks and 1/2 cup (100 gr) sugar

Heat until almost simmering: 2 cups heavy cream (475 ml)

Temper and mix

Strain

Blend in 1/2 tsp (2.5 ml) vanilla extract after the mixture has been strained.

Pour the mixture into six to eight ramekins.

Bake for one hour at 250°F or 120°C in a water bath

Refrigerate for eight hours

Caramelize each portion with 1 tsp. (4 gr) turbinato sugar


Source