Sunday, February 13, 2011

Aubergine with buttermilk sauce

    Abergine

    Aubergine with buttermilk sauce

    A perfect starter for a light supper. Yogurt sauce, as you may have noticed by now, is a regular presence in my recipes - that's because it has the ability to round up so many flavours and textures like no other component does. Here, I replace some of the yogurt with buttermilk, which adds an acidity that works wonders with the slightly greasy nature of the aubergine and the sweet pomegranate seeds. Za'atar is a Middle Eastern spice blend of sumac, sesame seeds and herbs. Serves four as a starter.

    2 large and long aubergines

    75ml olive oil

    Coarse sea salt and freshly ground black pepper

    1 pomegranate

    1 tsp za'atar

    A few sprigs fresh lemon thyme

    For the sauce

    140ml buttermilk

    100g Greek yogurt

    1½ tbsp olive oil, plus a drizzle to finish off

    1 small garlic clove, crushed

    Pinch salt

    Preheat the oven to 200C/400F/gas mark 6. Wash the aubergines and cut them in two lengthways through the green stalk (it looks better like this, even though you don't eat the stalk). Make three or four deep parallel incisions in the cut side of the aubergine, taking care not to cut as far as the skin. Then, at a 45-degree angle to these cuts, make four more, to create a diamond pattern.

    Put the aubergines, cut side up, on an oven tray lined with baking parchment and brush with the oil. Keep on brushing until all the oil has soaked into the flesh. Sprinkle with salt and pepper, and roast for 35-40 minutes, at which point the flesh should be soft, flavoursome and well browned. Remove and leave to cool.

    While the aubergines are in the oven, cut the pomegranate in two horizontally. Hold one half over a bowl, the cut side facing your palm, and with the back of a wooden spoon gently knock on the skin. Continue beating with increasing power until the seeds start falling into the bowl. Once all are out, sift through the seeds to remove any white skin bits. For the sauce, simply whisk together all the ingredients, taste for seasoning and keep cold until needed.

    To serve, put an aubergine half on a plate, flesh side up. Spoon over lots of sauce without covering the stalk, sprinkle on lots of pomegranate seeds and some za'atar, garnish with lemon thyme and finish with a drizzle of oil.

    · Yotam Ottolenghi is chef/patron of Ottolenghi in London.

Carrot Cake by OTTOLENGHI


1 Preheat the oven to 170°C/Gas Mark 3. Grease a 20cm springform
cake tin and line the base and sides with baking parchment.

2 Sift together the flour, baking powder, bicarbonate of soda and spices.
Lightly whisk the whole egg with the egg yolk.

3 Put the sunflower oil and caster sugar in the bowl of an electric
mixer fitted with the beater attachment and beat for about a minute
on a medium speed. On a low speed, slowly add the beaten egg.
Mix in the walnuts, coconut and carrot and then the sifted dry
ingredients. Don’t over mix.

4 Transfer the mixture to a large bowl. Wash and dry the mixer bowl,
making sure it is totally clean, then put the egg whites and salt in
it and whisk on a high speed until firm peaks form. Gently fold the
egg whites into the carrot mixture in 3 additions, being careful not
to over mix. Streaks of white in the mixture are okay.

5 Pour the cake mixture into the prepared tin and bake for approximately
1 hour; it could take longer. A skewer inserted in the centre should
come out dry. If the cake starts getting dark before the centre is
cooked through, cover it with foil. Let the cake cool completely and
then remove from the tin.

6 To make the icing, beat the cream cheese in a mixer until light and
smooth. Remove from the mixer. Beat the butter, icing sugar and
honey in the mixer until light and airy. Fold together the cheese and
butter mixes. Spread waves of icing on top of the cake and sprinkle
with the nuts.

Serves 6-8

  • 160g plain flour
  • ½ tsp baking powder
  • ½ tsp bicarbonate of soda
  • 1 tsp ground cinnamon
  • ¼ tsp ground cloves

  • 1 large free-range egg
  • 1 free-range egg yolk

  • 200g sunflower oil
  • 270g caster sugar
  • 50g walnuts, chopped
  • 50g desiccated coconut
  • 135g carrot, roughly grated
  • 2 free-range egg whites
  • a pinch of salt

  • Icing
  • 175g cream cheese,
  • at room temperature
  • 70g unsalted butter
  • 35g icing sugar
  • 25g honey
  • a dash of lemon juice
  • 30g walnuts, chopped
  • and lightly toasted

Sunday, February 6, 2011

Creme Brulee (Crème Brûlée) by Michael Chu

This is one "fancy" dessert that you can make ahead of time with a minimum of effort and still have all your guests excited about your culinary skills.

Creme brulee should start with a custard base that is richer, creamier, and silkier than other cremes (creme anglaise, creme caramel, flan, etc.).

On top of that custard should be a layer of caramelized sugar. This sugar can be thick or thin. Thin layers (some as thin as paper) are produced by directly heating a sugar layer using a broiler or torch. I make my creme brulee with a torch and turbinado sugar (muscovado sugar).


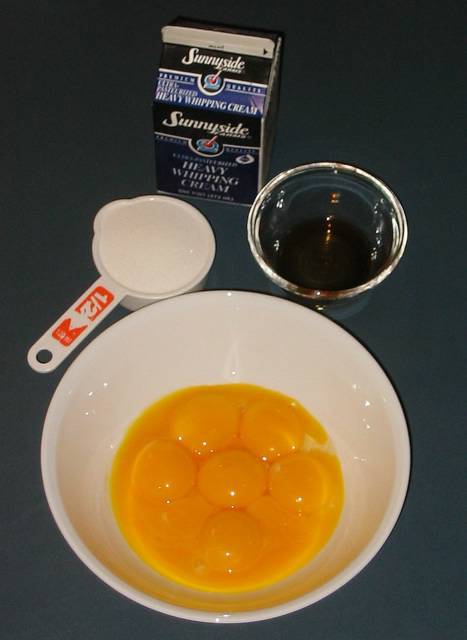
Ingredients

2 cups heavy cream

1/2 teaspoon vanilla extract

8 large egg yolks

1/2 cup sugar.


Prosidure:

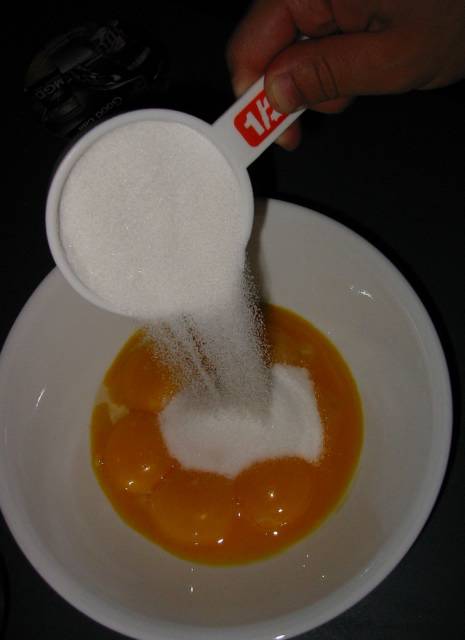
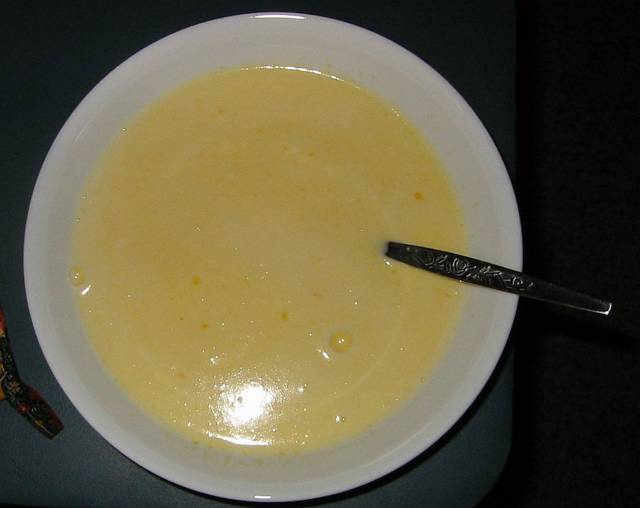
First pour the sugar into the egg yolks.


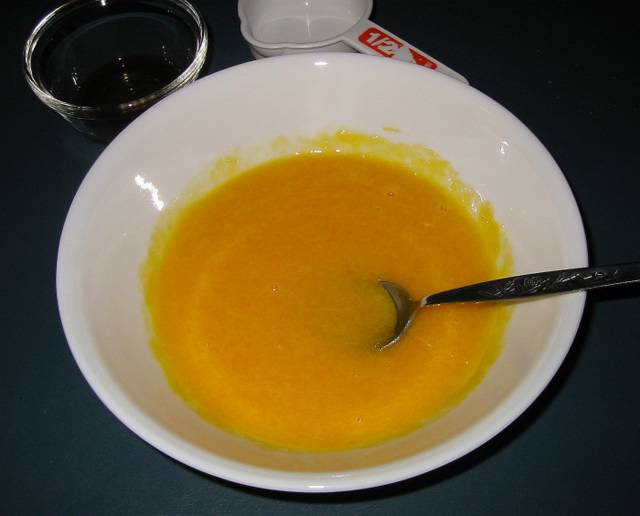
Beat the yolks until smooth.


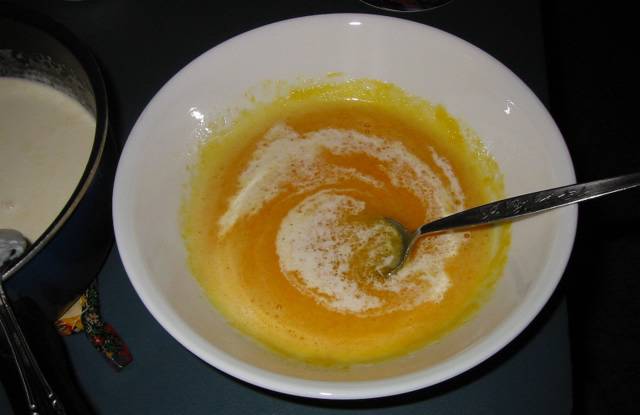
Heat the heavy cream until almost simmering (you can bring to a simmer and let it cool a minute). Add heavy cream to the egg yolks one tablespoon at a time while stirring vigorously. This will temper the eggs so as to not curdle them (or make scrambled eggs) when exposed to the heat of the heavy cream.


When about 1/4 cup of heavy cream has been integrated into the yolks, pour the yolks into the heavy cream and mix until smooth.


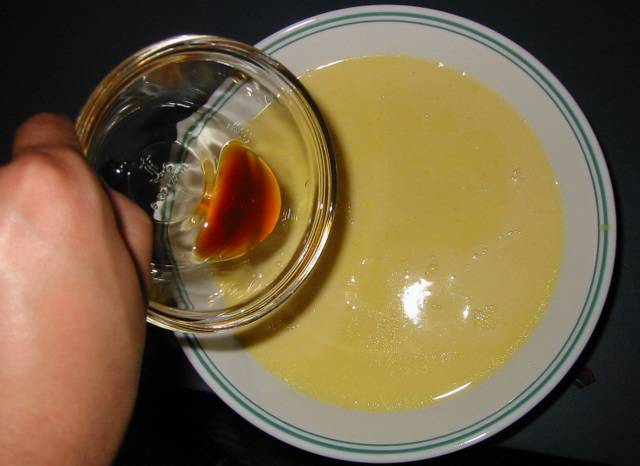
Now, using a fine mesh sieve, strain the custard mixture to remove any small clumps that may remain in the mixture. This step will help ensure a silky texture to the custard. Blend in the vanilla extract after the mixture has been strained.


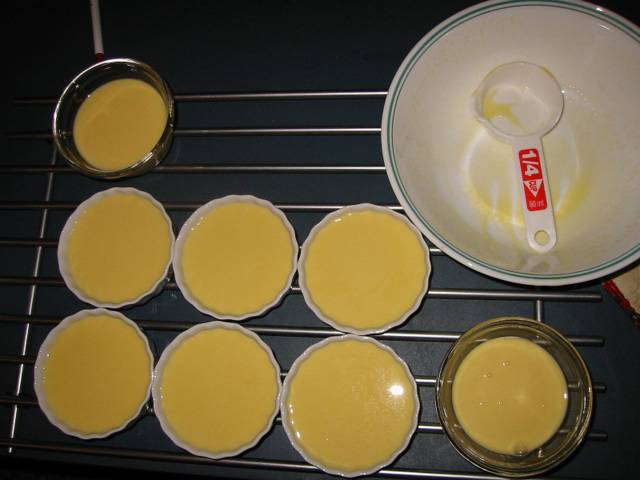
Pour the mixture into six to eight ramekins depending on size. (Makes a little more than eight four-ounce creme brulees.) In the picture below, I filled six four-ounce ramekins and two six ounce ramekins (the six-ouncers were not full).


Place the ramekins in a baking pan. Pour boiling water into the pan (be careful not to get water into the ramekins), so that the water level is halfway up the sides of the ramekins. Cooking the custards in a water bath will provide a low even temperature for the custards to cook evenly and set properly. Place in an oven preheated to 250°F for about one hour.


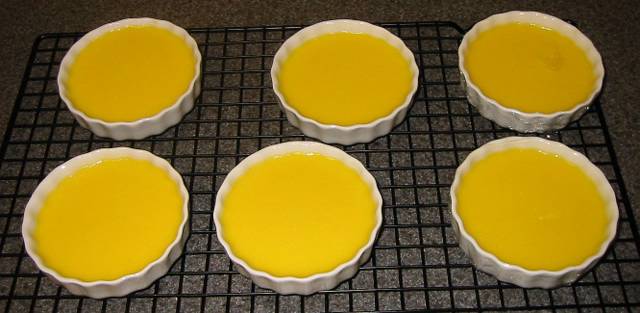
After an hour, check to see if the custards are done. We want them to be set on the outside edge, but jiggly (like jello) at the center. The easiest way to do this is to take a pair of tongs with food grade rubber bands wrapped around the ends to help grip the ramekins. Pick up a ramekin and shake to see if the centers jiggle. If only the center jiggles a little, it's done. If the whole thing is set, remove immediately - it'll be a little over done, but still delicious. If it's not done, just put it back in the water bath and check again in ten minutes. Once the custards are done, let them cool on a cooling rack to room temperature. This will let the custards finish cooking the centers on their own.


Wrap the custards in their ramekins in plastic wrap and refrigerate for at least eight hours before serving.

About an hour before serving, remove the plastic wrap from each ramekin and use a paper towel to gently soak up any moisture that may have extruded from the custard tops.

Pour about a teaspoon of turbinado ("sugar in the raw") sugar in the middle of each custard.

Tilt the ramekin and gently shake to let gravity move the sugar around until the top surface of the custard is covered evenly with turbinado sugar.

Using a kitchen butane torch, propane blow torch, or welding torch (whatever strong open flame you've got lying around), heat the sugar until it bubbles and changes color.

With a small butane torch, I take my time and don't move from one side of the creme brulee to the other until the spot I've been working on has achieved the brown color that I want. This takes a little over a minute for each creme brulee. (The process is faster with a larger torch.)

Don't worry about heating up the custard underneath, we'll refrigerate the creme brulee for a bit before serving. Do worry about lighting your kitchen counter on fire. I usually place the ramekin on a piece of aluminum foil placed over a cooling rack.

Once you're done scorching your cream, place the ramekins back in the refrigerator for about 45 minutes. The caramel will still be hard, but if you wait too much longer, the sugar will start to soften and dissolve into the custard.


Créme brûlée for 8 people

Preheat the oven to 250°F or 120°C

Mix 8 large (135 gr) egg yolks and 1/2 cup (100 gr) sugar

Heat until almost simmering: 2 cups heavy cream (475 ml)

Temper and mix

Strain

Blend in 1/2 tsp (2.5 ml) vanilla extract after the mixture has been strained.

Pour the mixture into six to eight ramekins.

Bake for one hour at 250°F or 120°C in a water bath

Refrigerate for eight hours

Caramelize each portion with 1 tsp. (4 gr) turbinato sugar


Source


Sunday, January 23, 2011

The famous ducken

This is the famous ducken. First made by Bjarni and Ragnar on Saturday, January 22, 2011.
It is divine!

Materials:
1 Duck
1 Chicken
A packet of bacon
2 teaspoons salt
2 teaspoons paprika
1 teaspoon black pepper
1/2 cup melted butter

Stuffing:
bread crumbs (from the baker!)
Dried apricots
Raisins
Bacon
Olive Oil
Thyme
Rosemary
Paprica
Garlic
Onion powder
Salt
Pepper
2 raw eggs


Method:
1. Debone the chicken and the duck.
Detailed instructions on how to debone a turkey are found here. They are summarized below.
Use heavy shears to cut across the back of the bird. Crack it open, exposing the inside of bird.
Using a small paring knife and your fingers to remove the bones. Try not to pierce the skin of front side of
the bird.
Throw all bones into a pot. You can use them to make stock.
1a. The chicken
Take all bones from the chicken. Cut off the wings of the chicken with the heavy shears.
1.b. The duck
Remove all bones except the legs and the wings.

2. Make the stuffing
Started with 1 and a half cups crumbs and then added the other ingredients. No firm instructions as to how much of anything should be in there - just play it by ear. Other ingredients to consider: Nuts and mushrooms.

3. Assemble the ducken
The following pictures are from this turducken recipe. The procedure we used was:
1. Lay the deboned duck with the skin side down.
2. Put a single layer of bacon, covering the inside of the duck.
3. Put a layer of stuffing on top of the bacon.
4. Put the deboned chicken on top of the stuffing, skin side down.
5. Put a second layer of stuffing on top of the chicken.
6. Close the chicken by folding it and sticking a metal skewer through its back.
7. Close the duck by folding it and sticking a metal skewer through its back.
8. Remove the skewer from the chicken. Leave the skewer in the duck.
9. Rub salt, pepper, and paprika into the skin of the duck on its back side.
10. Place breast side up in a roasting pan.
11. Rub salt, pepper, and paprika into the skin of the breast side.
12. Roast the ducken.

Chicken open skin side down
A layer of stuffing is put on top of chicken
A skewer is used to close up chicken
A second skewer is used to close the duck around the chicken

4. Roast the ducken
These directions are taken from this roast duck recipe.
  • Preheat oven to 375 degrees F (190 degrees C).
  • Roast ducken in preheated oven for 1 hour. Spoon 1/4 cup melted butter over bird, and continue cooking for 45 more minutes. Spoon remaining 1/4 cup melted butter over duck, and cook for 15 more minutes, or until golden brown.
Cook until the internal temperature reaches 74 degrees C.

Sunday, December 12, 2010

Pie Crust from William and Sonoma

Found here.

Ingredients:

  • 1 1/4 cups unbleached all-purpose flour
  • 1 Tbs. sugar
  • 1/4 tsp. salt
  • 8 Tbs. (1 stick) cold unsalted butter, cut into 1/4-inch cubes
  • 3 Tbs. very cold water

Directions:

To make the dough by hand, in a large bowl, stir together the flour, sugar and salt. Using a pastry cutter or 2 knives, cut the butter into the flour mixture until the texture resembles coarse cornmeal, with butter pieces no larger than small peas. Add the water and mix with a fork just until the dough pulls together.

To make the dough in a stand mixer, fit the mixer with the flat beater, and stir together the flour, sugar and salt in the mixer bowl. Add the butter and toss with a fork to coat with the flour mixture. Mix on medium-low speed until the texture resembles coarse cornmeal, with the butter pieces no larger than small peas. Add the water and mix on low speed just until the dough pulls together.

Transfer the dough to a work surface, pat into a ball and flatten into a disk. (Although many dough recipes call for chilling the dough at this point, this dough should be rolled out immediately for the best results.) Lightly flour the work surface, then flatten the disk with 6 to 8 gentle taps of the rolling pin. Lift the dough and give it a quarter turn. Lightly dust the top of the dough or the rolling pin with flour as needed, then roll out into a round at least 12 inches in diameter and about 1/8 inch thick. Makes enough dough for one 9-inch single-crust pie or one 10-inch galette.

To make a double-crust pie: Double the recipe, cut the dough in half and pat each half into a round, flat disk. Roll out one disk into a 12-inch round as directed and line the pan or dish. Press any scraps trimmed from the first round into the bottom of the second disk. Roll out the second dough disk into a round at least 12 inches in diameter and about 1/8 inch thick and refrigerate until ready to use.

To make a lattice top: Double the recipe, cut the dough in half and pat one half into a round, flat disk. Roll out the disk into a 12-inch round as directed and line the pan or dish. Trim the edge of the dough, leaving a 1/2-inch overhang. Press any scraps trimmed from the first round into the bottom of the remaining dough half. Pat the dough into a rectangle and roll out into a rectangular shape about 1/8 inch thick. Trim to cut out a 14-by-11-inch rectangle and refrigerate until ready to use.

Nut Dough Variation: Add 2 Tbs. ground toasted pecans, walnuts, almonds or hazelnuts to the flour mixture and proceed as directed.

Make-Ahead Tip: Pie dough may be made ahead and frozen for up to 2 months. To freeze, place the dough round on a 12-inch cardboard circle and wrap it well with plastic wrap. Alternatively, use the round to line a pie pan or dish, flute the edge and wrap well.
Adapted from Williams-Sonoma Collection Series, Pie & Tart, by Carolyn Beth Weil (Simon & Schuster, 2003).

Cheddar-Bacon Biscuits from Williams Sonoma


Found here

Enriched with diced bacon plus two kinds of cheeses, these savory biscuits are baked in a fry pan that’s brushed with a bit of bacon fat to further enhance the flavor.

Ingredients:

  • 6 oz. bacon, diced
  • 2 cups all-purpose flour
  • 1 Tbs. baking powder
  • 1 tsp. kosher salt
  • 2 tsp. sugar
  • 3/4 tsp. freshly ground pepper
  • 8 Tbs. (1 stick) cold unsalted butter, cut into 8 pieces, plus 2 Tbs. melted butter
  • 3/4 cup shredded extra-sharp cheddar cheese
  • 1/4 cup grated Parmigiano-Reggiano cheese
  • 3/4 cup plus 2 Tbs. buttermilk

Directions:

Preheat an oven to 425°F or 220°C

In an 11-inch fry pan over medium-high heat, cook the bacon, stirring occasionally, until crisp, about 10 minutes. Using a slotted spoon, transfer the bacon to a paper towel-lined plate. Discard all but 1 Tbs. of the fat in the pan. Using a pastry brush, spread the fat evenly over the pan bottom. Finely chop the bacon. Set aside.

In a large bowl, whisk together the flour, baking powder, salt, sugar and pepper. Using a pastry blender or 2 knives, cut in the cold butter until pea-size crumbs form, then use your fingers to pinch the crumbs into flat disks. Stir in the cheddar and Parmigiano-Reggiano cheeses and the bacon. Stir in the buttermilk until the dough just comes together.

Transfer the dough to a floured work surface and roll out into a 9 1/2-by-11-inch rectangle. Fold the dough into thirds, rotate 90 degrees and roll out into the same-size rectangle. Fold into thirds again, rotate 90 degrees and roll out into a 7-by-9 1/2-inch rectangle about 1⁄2 inch (12mm) thick. Using a floured 2 1/2-inch biscuit cutter, cut out biscuits and place in the fry pan. Gather up the scraps, reroll the dough and cut out more biscuits. You should have 9 biscuits around the circumference of the pan and 3 in the center. Brush the tops of the biscuits with the melted butter.

Bake the biscuits until golden brown and a toothpick inserted into the center comes out clean, 20 to 25 minutes. Let cool for 10 minutes before serving. Makes 12 biscuits.

Williams-Sonoma Kitchen.

Lamb and Wild Mushroom Shepherd's Pie from Williams & Sonoma

Found here.


Most mushrooms sold in the market today are already quite clean, but you may still need to attend to them a bit at home. Gently brushing mushrooms with a damp cloth or soft brush, such as a mushroom brush or pastry brush, is preferable to washing them. Porous mushrooms will soak up water like a sponge, compromising both the texture and flavor of any dish. Do not scrub so hard that you remove the thin outer skin on the caps; you want only to loosen any dirt or grit. Be sure to rinse the bristles on the brush if they begin to get soiled.

Ingredients:

For the filling:

  • 2 lb. shoulder blade lamb chops, trimmed of fat
      and boned
  • 1 lb. assorted wild mushrooms, such as cremini,
      portobello and shiitake
  • 2 Tbs. all-purpose flour
  • 3/4 tsp. kosher salt
  • 1/2 tsp. freshly ground pepper
  • 1/2 tsp. ground allspice
  • 3 Tbs. olive oil
  • 3 large shallots, minced
  • 3 large garlic cloves, minced
  • 1 Turkish bay leaf, minced
  • 1 3/4 cups beef stock
  • 1 Tbs. tomato paste

For the topping:

  • 6 small Yukon Gold potatoes, 1 1/2 lb. total
  • 1/3 cup milk
  • 4 Tbs. (1/2 stick) unsalted butter
  • 1/2 tsp. kosher salt
  • Freshly ground pepper, to taste
  • 1/4 cup chopped fresh chives

Directions:

To make the filling, cut the lamb into 1/2-inch pieces. Stem and cut the mushrooms into 3/4-inch pieces. In a large bowl, mix together the flour, salt, pepper and allspice. Add the lamb and toss to coat evenly.

In a large nonstick fry pan over medium-high heat, warm 2 Tbs. of the olive oil. Add the lamb and sauté until well browned, about 10 minutes. Transfer to a bowl. Add the remaining 1 Tbs. oil to the pan. Add the shallots and garlic and stir for 1 minute. Add the mushrooms and bay leaf and sauté until well browned, about 6 minutes.

Return the lamb to the pan, stir in the stock and tomato paste and bring to a boil. Reduce the heat to medium-low, cover and simmer until the lamb is tender, about 45 minutes. Uncover and simmer until the juices thicken, about 2 minutes. Transfer the filling to a 9-inch pie dish.

Preheat an oven to 350°F.

To make the topping, pour water to a depth of 1 inch into a large pot and bring to a boil over high heat. Peel and slice the potatoes into rounds 1/4 inch thick. Put the potato slices into a steamer basket and set the basket over the boiling water. (The water should not touch the bottom of the steamer basket.) Cover and steam until the potatoes are tender when pierced with a small knife, about 12 minutes. Transfer the potatoes to a large bowl. Add the milk, butter, salt and pepper. Mash well with a potato masher. Stir in half of the chives. Spoon the potatoes on top of the lamb mixture to cover it completely.

Bake the pie until it is heated through and the potatoes just begin to brown, about 35 minutes. Sprinkle with the remaining chives and serve immediately. Serves 4.
Adapted from Williams-Sonoma Collection Series, Potato, by Selma Brown Morrow (Simon & Schuster, 2002).